Desserts
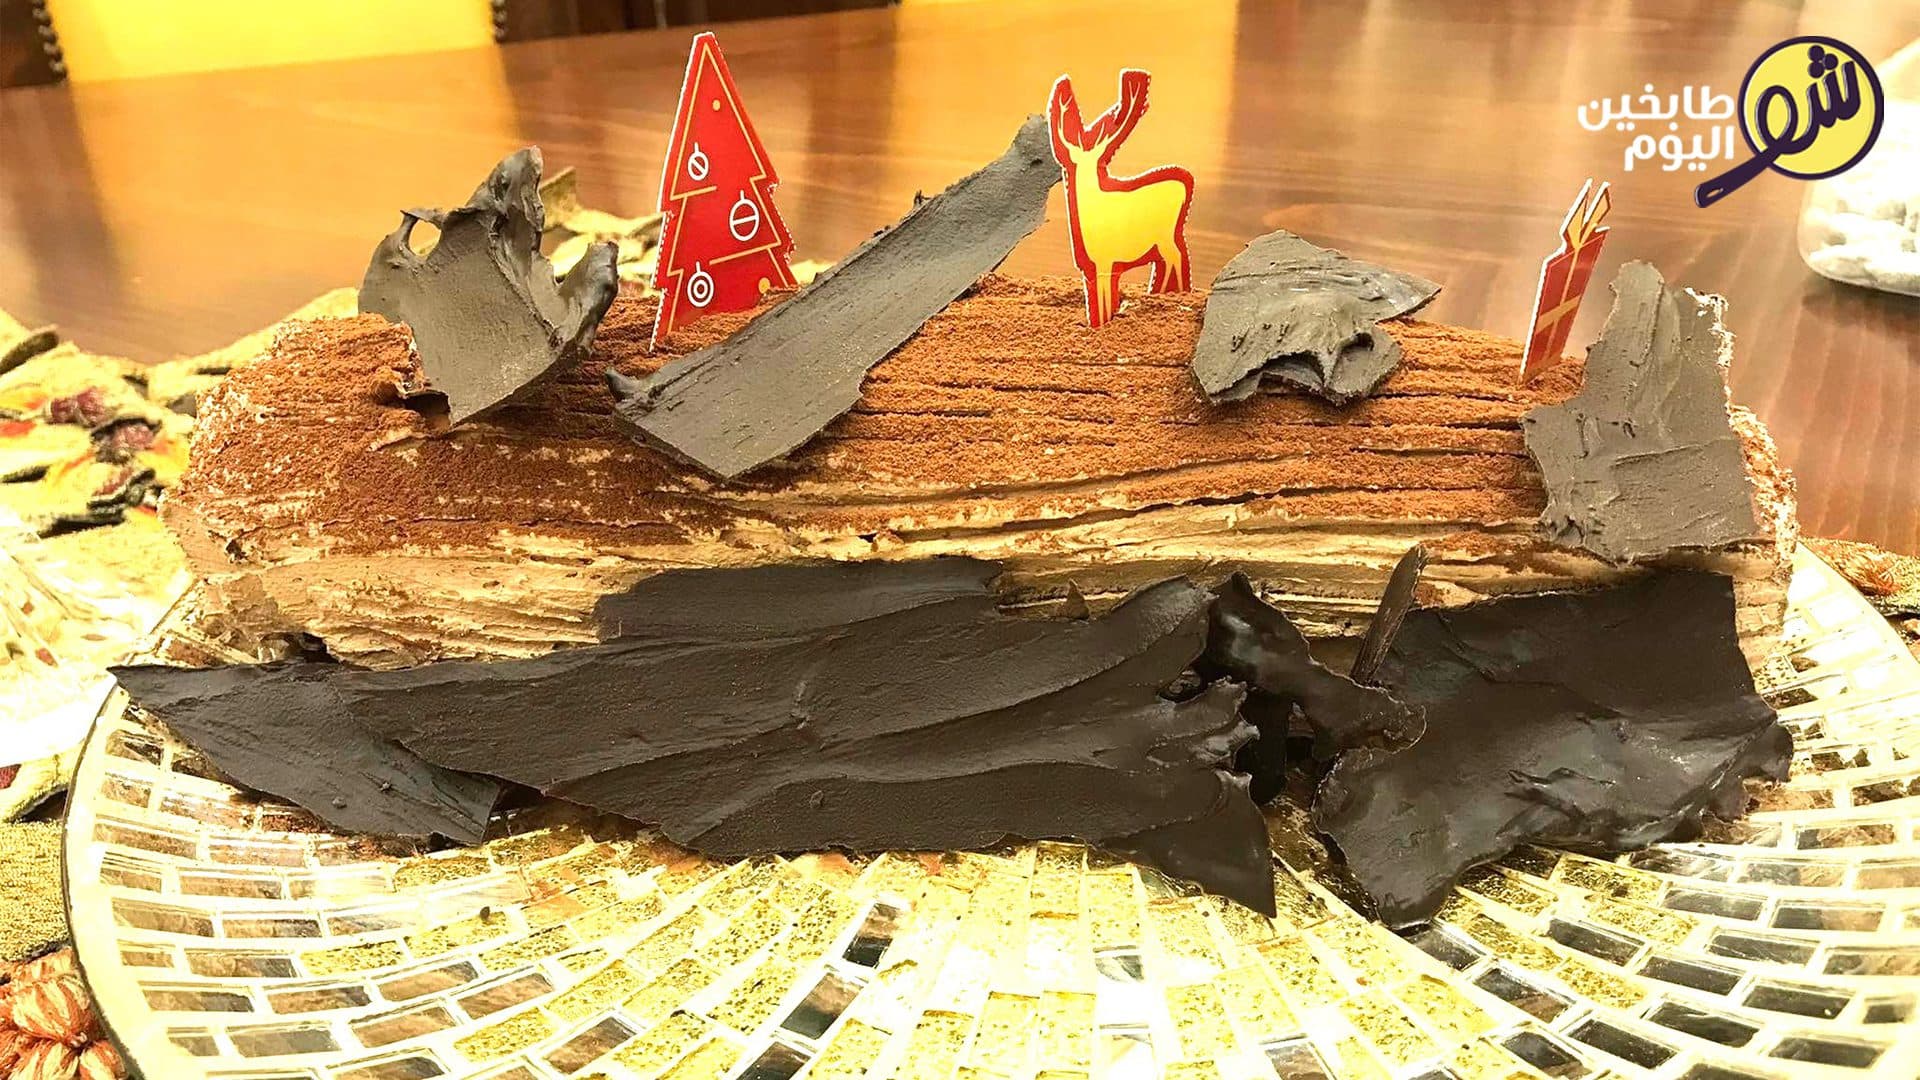
How to Pour Chocolate
A detailed, precise home recipe for pouring chocolate — includes the fine points needed to successfully make chocolate pieces at home. The method is easy, but there are a few secrets :)
Total time120 min
Prep30 min
Cook90 min
Yield8 servings
DifficultyMedium
ReviewsNo public ratings yet
Adjust servings
Ingredient quantities update instantly for your selected yield.
Recipe tags
DessertsLevantVegetarianGluten freeEgg free
Recipe story
How to pour chocolate — a detailed recipe for the tastiest chocolates for serving at events, especially for hospitality
Ingredients
- Plain couverture chocolate bars, broken into pieces to make melting in a bain-marie easier
- Possible fillings we can use:
- Plain caramel
- Caramel with peanuts
- Cotton candy
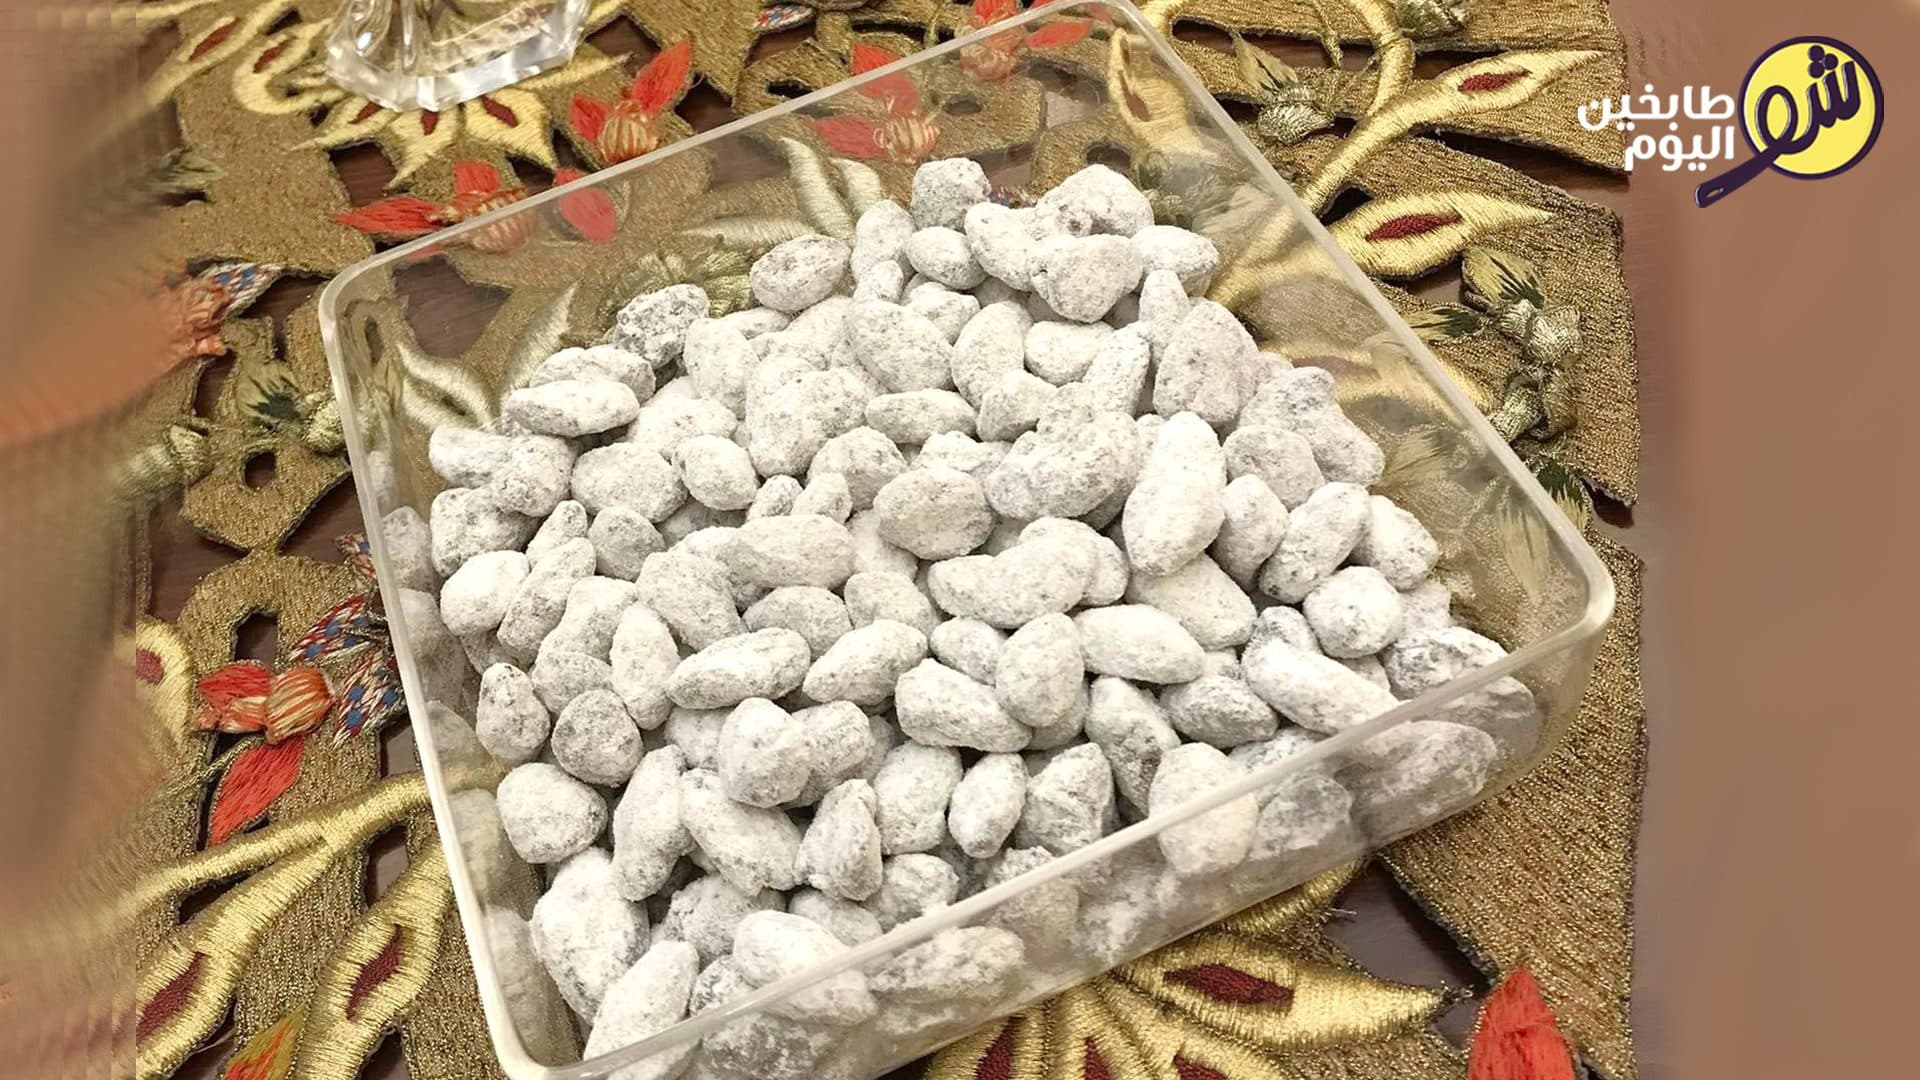
- Roasted, chopped almonds
- Pistachios
- Min w Salwa
- Desiccated coconut
- or
- As desired
- Ready-made fillings from specialty shops can be purchased
- The precise method for pouring chocolate is shared by our friend and chef on Sho Tabkhin Today:
- Alisar Rajab
- Click Alisar's name to visit her page and see all her delicious recipes
- For more dessert recipes from Alisar here is Easy Honeycomb
- What do you think about making Marshmallows at home too?!
Method
- Place a little water in a saucepan, then set a stainless steel or glass bowl over the saucepan and put the chocolate pieces in it—do not use any other type of bowl for melting chocolate so its texture doesn't change. The water must not touch the bottom of the bowl holding the chocolate.
- Stir the chocolate in the bowl while the water underneath is boiling until the chocolate is completely liquid.
- Prepare the molds—there are two types: silicone or hard plastic.
- In the first stage, pour a layer of chocolate into the mold until it fills, then tap the mold's edges with a wooden spoon or another hard object to release air from the chocolate pieces. If using silicone molds, place the mold on a baking tray and tap the tray because it's hard to tap the silicone directly. When bubbles appear, the air has been released.
- Pour the chocolate back out of the mold into the main bowl you melted the chocolate in. You'll notice the mold is now coated with a thin chocolate layer on the inside—this step is called hollowing or the "shell." If the filling you'll use is soft, like caramel, let the mold cool so the thin chocolate shell firms up, then add the filling; if the filling is dry, like nuts, add it immediately before cooling.
- Put the mold in the refrigerator for only a few minutes, not longer.
- Remove the mold and pour a second layer of chocolate over the filling to seal each chocolate—that is, to fill the small molds.
- Also tap the mold or tray to release any remaining air from the chocolates.
- Use a dry palette knife to remove excess chocolate, then place the mold in the refrigerator for a few minutes.
- With silicone molds, the chocolates come out easily as soon as they set. For plastic molds you must watch the bottom and sides—you'll notice chocolates stay stuck to the edges while they're not ready; when they are set and dry you won't see chocolate sticking to the inner edges anymore. Wait until all pieces are ready before opening a plastic mold because it contains multiple pieces and you can't remove one without the others — otherwise the unset pieces may break.
- Elissar Rajab
- For more desserts from Elissar, here's the easy Honeycomb Pastry.
- How about making marshmallows at home too?!
Notes and serving ideas
- Easy Honeycomb
- Marshmallows